Flash photography basics
Take control of the light. Learn to use your camera's built-in flash and a speedlight so that the result is soft and natural – not harsh, flat or overexposed.
How flash works
Flash is not just extra light for the dark – it is a tool for controlling the amount, direction and softness of light. Before you press the shutter, it pays to understand a few basic concepts.
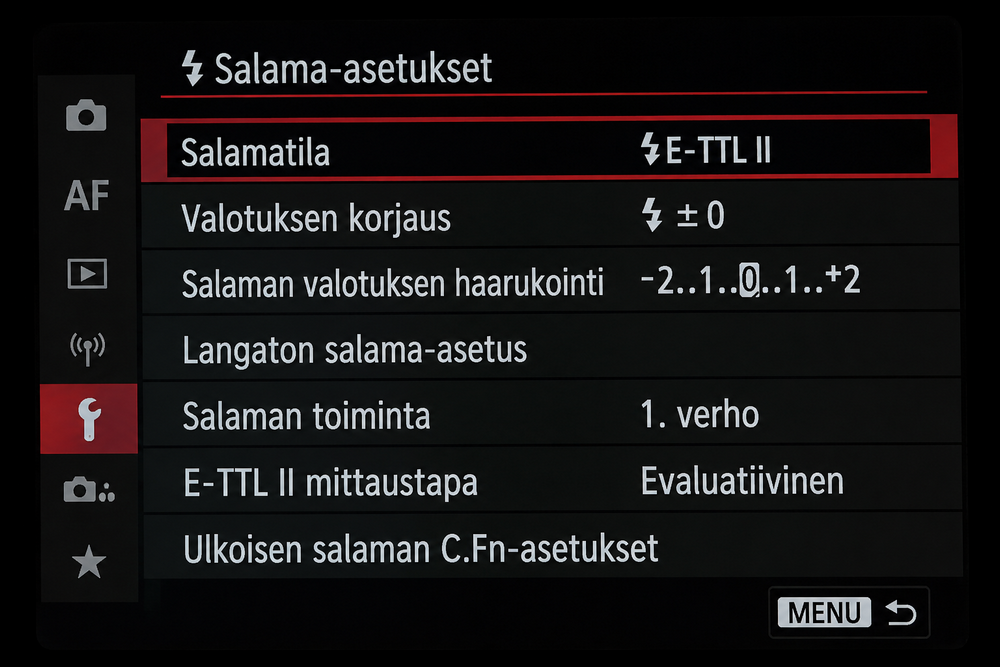
You can control the flash power, mode and sync directly from the camera menu.
- TTL (Through The Lens): The camera's automatic flash metering. Just before the photo the camera fires a weak pre-flash, measures it through the lens and sets the flash power for you. You can fine-tune the power with flash exposure compensation (FEC, e.g. -1 EV).
- M (Manual): You choose the flash power, for example 1/1 (full power), 1/8 or 1/64. The exposure stays the same from shot to shot, which is useful in the studio and for product photos.
- Flash sync speed: The fastest shutter speed at which the flash lights the whole frame. It is usually 1/160–1/250 s – check your camera's value in the manual. Faster shutter speeds need the HSS (High-Speed Sync) function.
- Distance is everything: Flash light weakens quickly with distance. When the distance doubles, only a quarter of the light reaches the subject. That is why a nearby subject easily overexposes and a more distant background stays dark.
The built-in flash: from last resort to a useful tool
The camera's built-in flash points straight forward and therefore gives harsh, flat light. Used the right way, though, it is surprisingly useful.
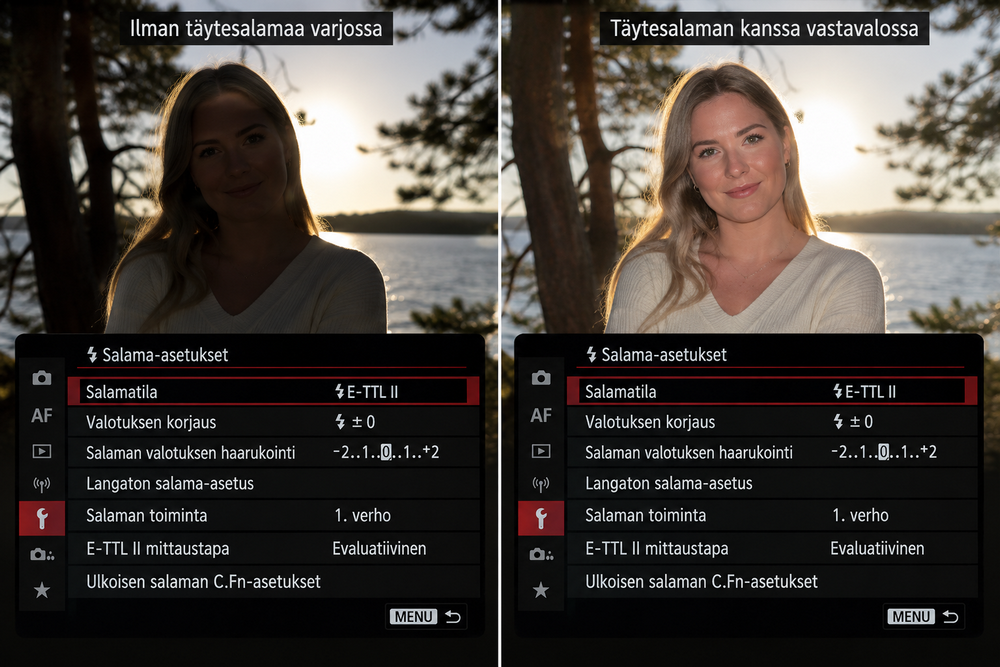
Fill flash opens up the shadows on faces in bright backlight.
Fill flash: The best time for a built-in flash is not pitch darkness but a bright day with backlight. When the sun is behind your subject, the face is in shadow. Turn on the flash and lower its power (FEC about -1…-2 EV): the shadows open up naturally and a lively catchlight appears in the eyes.
Slow sync
In the evening the flash lights the subject but the background stays black. Slow sync lengthens the shutter speed, so the background lights and atmosphere are recorded too. Hold the camera steady or use a tripod.
Rear-curtain sync
The flash fires at the end of the exposure, so the light trails of a moving subject fall behind it in a natural direction. Try it for example for dancers or cyclists at dusk.
Speedlight: the direction of light in your hands
A separate speedlight changes everything, because you can turn and tilt its head freely. The softness of the light depends on how large the light source is relative to the subject: the larger the surface lighting the subject, the softer the shadows.
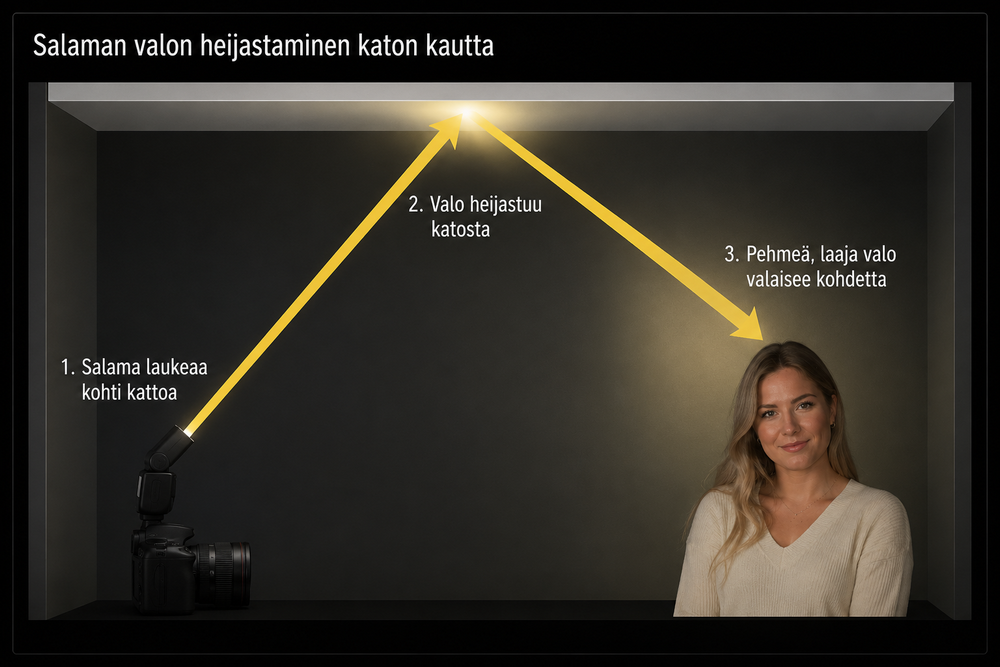
Bounce the flash off the ceiling or a wall to soften the light.
1. Ceiling and wall bounce
Turn the flash head towards the ceiling or a wall behind you at an angle. The light spreads over a large surface, becomes soft and falls on the subject naturally.
2. Beware of coloured surfaces
Light bounced off a yellow or green wall takes on the colour of the surface. Always bounce off a white or neutral grey surface.
3. Diffusers and softboxes
A diffuser dome or a small softbox on the flash head spreads the light and softens the shadows when there is no ceiling to bounce off.
4. Flash off the camera
With a wireless trigger you can place the flash to the side at about a 45-degree angle. Light from the side gives the face shape and depth that a flash on top of the camera can't.
Balancing flash and ambient light
In a flash photo you always make two exposures at the same time: one with the ambient light and one with the flash. When you know which setting affects what, you can adjust them separately:
| Setting | Ambient light (background) | Flash light (subject) |
|---|---|---|
| Shutter speed | Affects | No effect (within the sync speed) |
| Flash power | No effect | Affects |
| Aperture | Affects | Affects |
| ISO | Affects | Affects |
- 1. First without flash: Shoot in M mode and set ISO, aperture and shutter speed so that the background looks the way you want. A slightly darker background (about -1 EV) often looks best.
- 2. Turn on the flash: Bounce the light off the ceiling or use a diffuser.
- 3. Adjust the subject's brightness: Change the flash power (or the FEC in TTL mode) until the subject is exposed correctly. This doesn't affect the background.
- 4. Fine-tune the background: A faster shutter speed darkens the background, a slower one brightens it – the subject's exposure stays the same.
The most common problems
A black band in the photo?
The shutter speed is faster than the camera's sync speed, so the shutter curtain covers part of the frame. Use a slower shutter speed (e.g. 1/200 s) or turn on HSS.
Red eye?
Light reflects from the back of the eye when the flash is close to the lens. Bounce the light off the ceiling or move the flash off the camera.
A hard shadow on the wall?
Direct flash draws a sharp shadow behind the subject. Move the subject further from the wall or soften the light by bouncing it.
Subject blown out, background black?
The flash doesn't reach the background. Use a slower shutter speed or raise the ISO so that more ambient light is recorded in the background, and lower the flash power.
Subject blue, background orange?
Flash light is daylight-coloured, but indoor lights are warm. Put an orange CTO gel on the flash and set the white balance to tungsten.
Reflections in glasses?
When the flash is in line with the lens, the light reflects from the glasses straight into the camera. Bounce the light off the ceiling or light from the side, and ask your subject to tilt their head slightly.
Quick checklist
| Harsh sunshine / backlight | → fill flash, FEC -1…-2 EV |
| Soft light with a speedlight | → bounce off the ceiling or a wall |
| Background brightness | → adjust with the shutter speed |
| Subject brightness | → adjust with the flash power |
| Dusk or evening shot | → slow sync + a steady grip |
| Sync limit | → usually 1/160–1/250 s, beyond that HSS |