Night and northern lights photography
Learn to capture the starry sky and the dance of the aurora as a sharp, beautiful photo – with the right gear, settings and timing.
Darkness calls for technique
In the dark the camera's automatic modes are lost: they cannot find anything to focus on and cannot choose the right exposure. A successful night photo comes from keeping the camera perfectly still, letting as much light as possible reach the sensor and setting everything yourself in manual mode (M).
When and where to shoot?
- The dark season: In Finland you can photograph the northern lights from late August to early April. On the light summer nights the sky never gets dark enough.
- A clear sky: Cloud cover matters more than activity. Check the cloud forecast and look for a gap between the clouds.
- Aurora activity: Follow the Kp index and the solar wind. In South Ostrobothnia (Western Finland) the aurora can be seen at Kp 3–4 when the sky is dark and clear. Check the current situation on the site's aurora tracker.
- A dark spot: Get away from street lights and city light pollution. An open view to the north, for example at the edge of a lake or a field, is best.
- The moon: A full moon brightens the sky and weakens faint auroras, but it lights up the landscape beautifully. A half moon is often a good compromise.
1. Gear
In the dark you need a steady base and a fast lens:
- A sturdy tripod: Essential for exposures of several seconds.
- A wide-angle lens: A 14–24 mm lens fits a wide sky and the landscape into the frame.
- Remote release or 2 s timer: Stops the camera from shaking when you press the shutter.
- Spare batteries: Cold drains batteries fast. Keep the spares in a warm pocket. Read also protecting your camera in the cold.
- A head torch with a red light: Red light does not ruin your eyes' adjustment to the dark.
- Less noise, more stars: Stack a series of photos or make star trails – instructions: Photoshop: stacking photos.
2. Aperture (f/1.4–f/2.8)
Open the aperture as wide as it goes, in other words choose the smallest f-number.
That lets as much light as possible reach the sensor in a short time, so you can use a shorter exposure or a lower ISO.
3. ISO (1600–6400)
Raise the sensor's sensitivity enough.
A higher ISO amplifies the weak light so that even faint auroras and stars are recorded. Modern cameras often still give good results at ISO 3200–6400.
Other important settings
- RAW format: You can correct white balance, exposure and noise afterwards far more than in a JPEG.
- White balance 3500–4000 K: The sky stays bluish and the aurora a natural green. Auto white balance varies from frame to frame.
- Image stabilisation off: On a tripod, stabilisation can actually cause blur.
- Long exposure noise reduction off: Otherwise the camera takes an equally long dark frame after every shot, and you miss the best moments of the aurora.
- Lower screen brightness: On a bright screen in the dark the photo looks brighter than it really is. Check the exposure from the histogram.
Exposure time & the aurora
Match the exposure time to how fast the aurora is moving. With too long an exposure a fast-moving aurora blurs into a green mass and its shape is lost.
| Situation | Exposure time | ISO | Aperture |
|---|---|---|---|
| Fast-moving, bright aurora | 1–4 s | 1600–3200 | f/1.4–f/2.8 |
| Calm or faint arc | 8–15 s | 1600–3200 | f/1.8–f/2.8 |
| Starry sky without aurora | 15–25 s | 3200–6400 | f/1.8–f/2.8 |
| Moonlit landscape | 5–15 s | 800–1600 | f/2.8–f/4 |
- The 500 rule for stars: 500 / (focal length × crop factor) = the longest exposure in seconds before the stars start to stretch into lines. Example: 20 mm on full frame → 500 / 20 = 25 s.
- Note: With today's high-resolution sensors the stars can start to stretch sooner. If you want perfectly pin-sharp stars, use about half the time the 500 rule gives.
Focusing in the dark
Autofocus does not work against a dark sky, so focus manually:
- Switch the lens or camera to manual focus (MF).
- Turn the focus ring close to infinity (∞). The mark is often not exactly right, so always finish focusing by looking at the image.
- Find the brightest star or a distant light on the rear screen and zoom in on it digitally (Live View zoom).
- Turn the focus ring slowly until the star is as small and point-like as possible.
- Take a test shot and check the sharpness by zooming in. Tape the ring if needed so that the focus does not shift by accident.
Northern lights photos
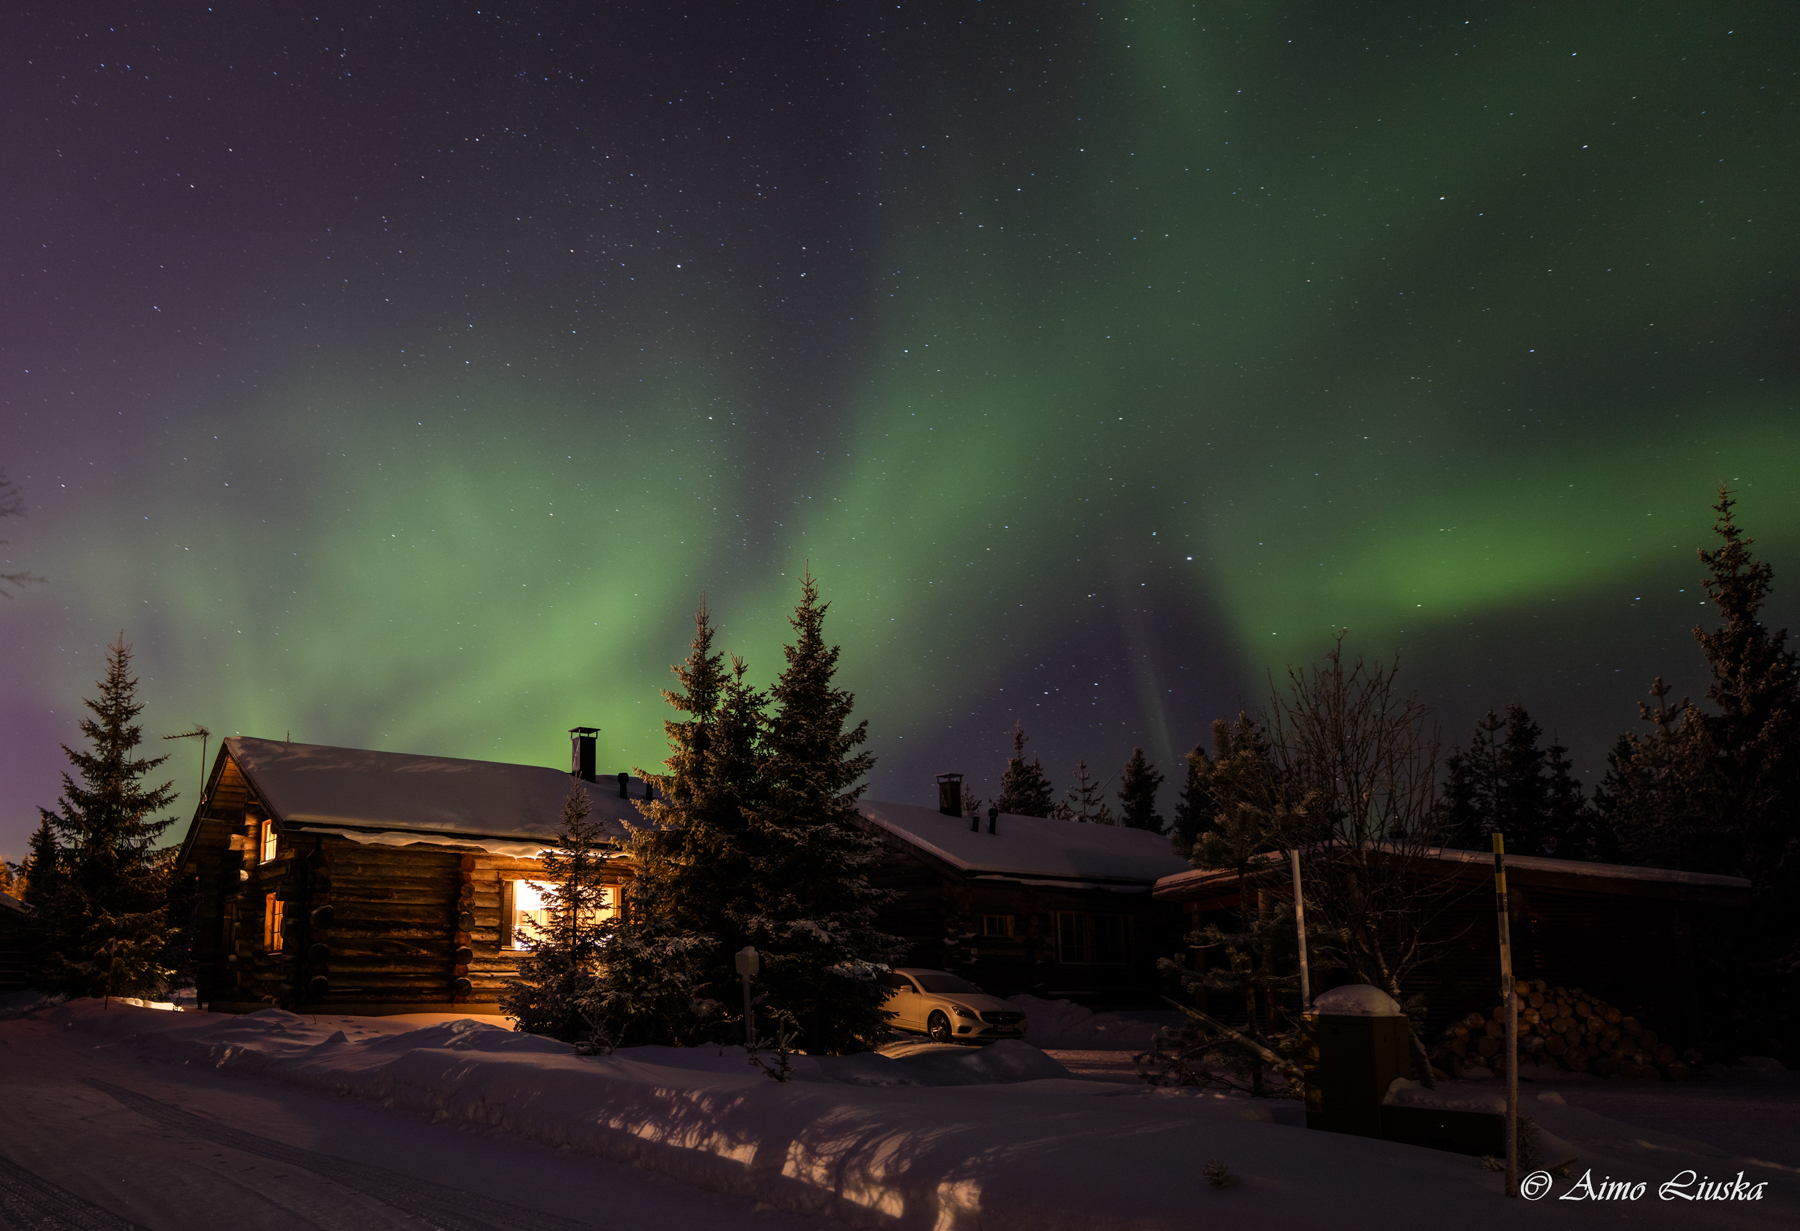
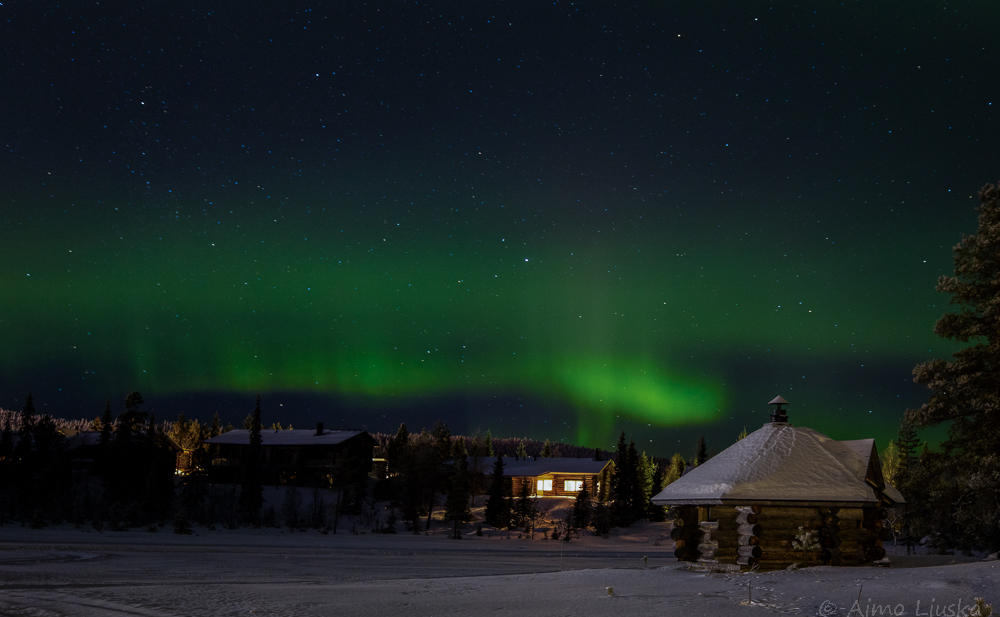
Composition tip: Sky alone often looks dull. Include some foreground – a tree, a rock, a boathouse or a lake surface that reflects the aurora. The foreground gives the photo scale and depth.
Lens fogging up?
Damp, cold air fogs the lens. Use a lens hood, and if needed wrap a heat pack or a USB lens heater around the lens.
Camera getting damp indoors?
When you bring a cold camera into the warmth it collects condensation. Put the camera in a bag or a plastic bag before going inside and let it warm up slowly.
Is the sky orange?
City light pollution colours the horizon. Move further away from the lights and lower the white balance to about 3500 K.
Are the stars blurry?
The focus has shifted or the exposure is too long. Refocus from the magnified view and shorten the exposure.
Post-processing
- White balance: Look for a natural tone where the aurora is green but the sky does not turn purple.
- Noise reduction: High-ISO noise is easy to control, for example with Lightroom's Denoise.
- Go easy on contrast: Too much Clarity or Dehaze makes the sky look dirty and brings out the noise.
- Keep it believable: Do not push the saturation too far. A believable photo is more striking than a neon-green one.
Safety first: Dress warmly in layers, tell someone where you are going, and watch out for ice and slippery rocks in the dark.