Making a slideshow with Slideshow Studio
Learn to create an impressive slideshow, add your photos and encode the finished video into a file step by step.
The screenshots in this guide are from the Finnish version of the program, so the button names may differ slightly from your version.
Starting a new project
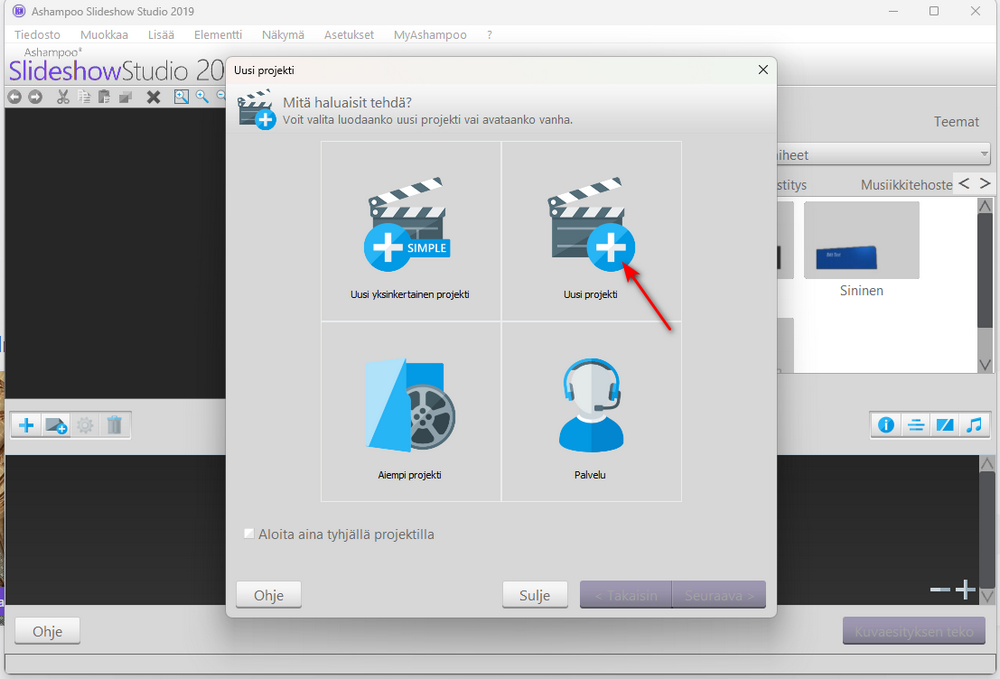
Open Ashampoo Slideshow Studio 2019. In the window that opens, choose New project to start creating a new slideshow. If the program isn't on your computer yet, see the installation guide first.
Choosing the aspect ratio
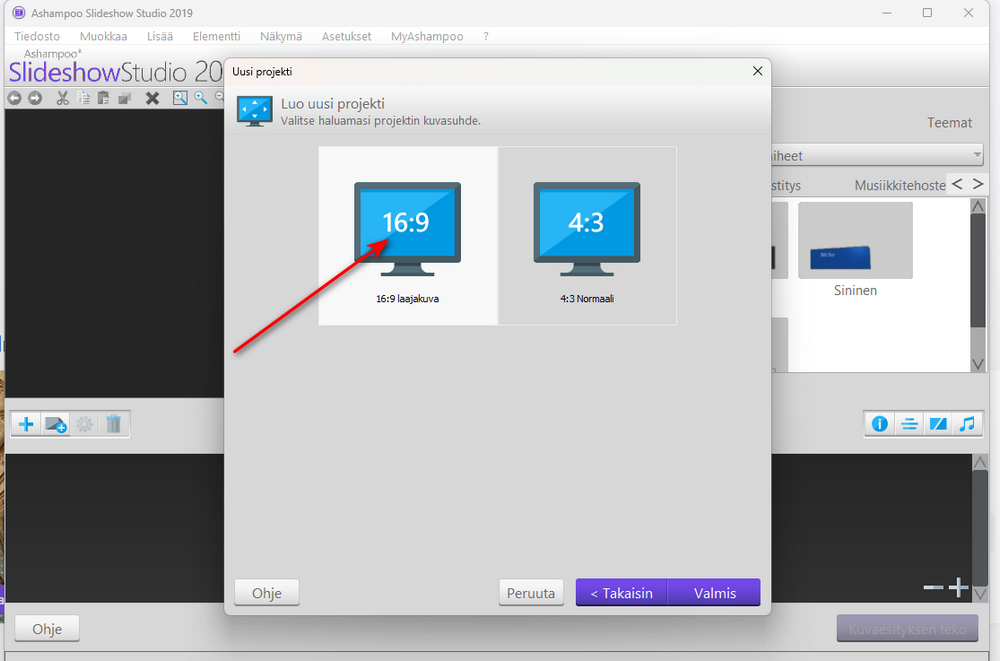
Choose a suitable aspect ratio for your slideshow. For modern screens and TVs the recommended choice is 16:9 widescreen. Then click Done.
Finding photos on your computer
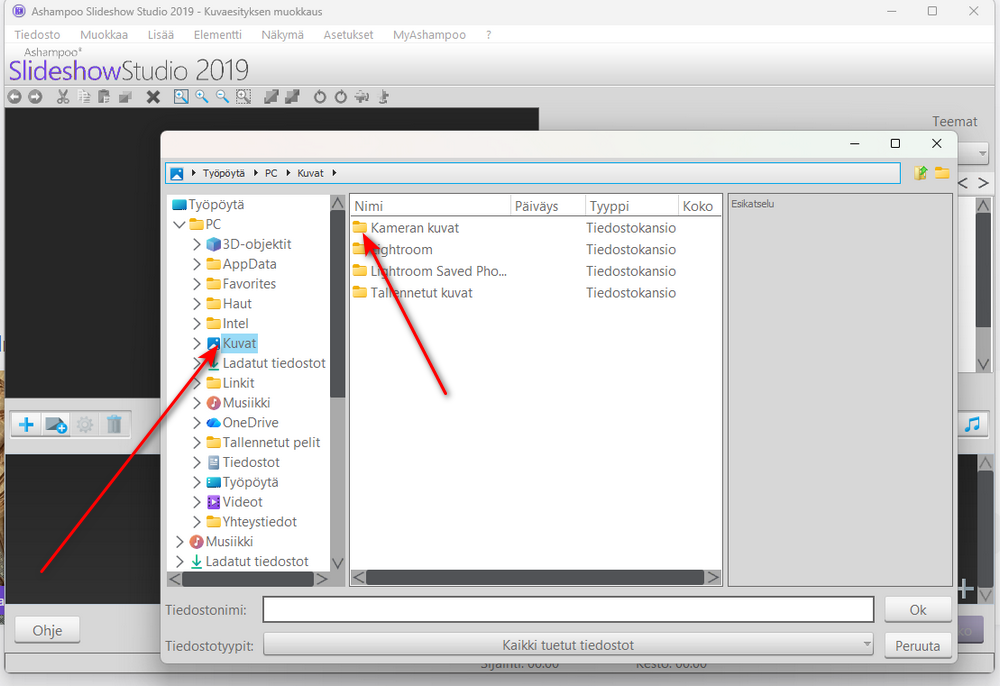
Browse your computer's folders, choose the picture or photo folder you want (e.g. Pictures / Camera Roll) and confirm with the OK button.
Adding photos to the timeline
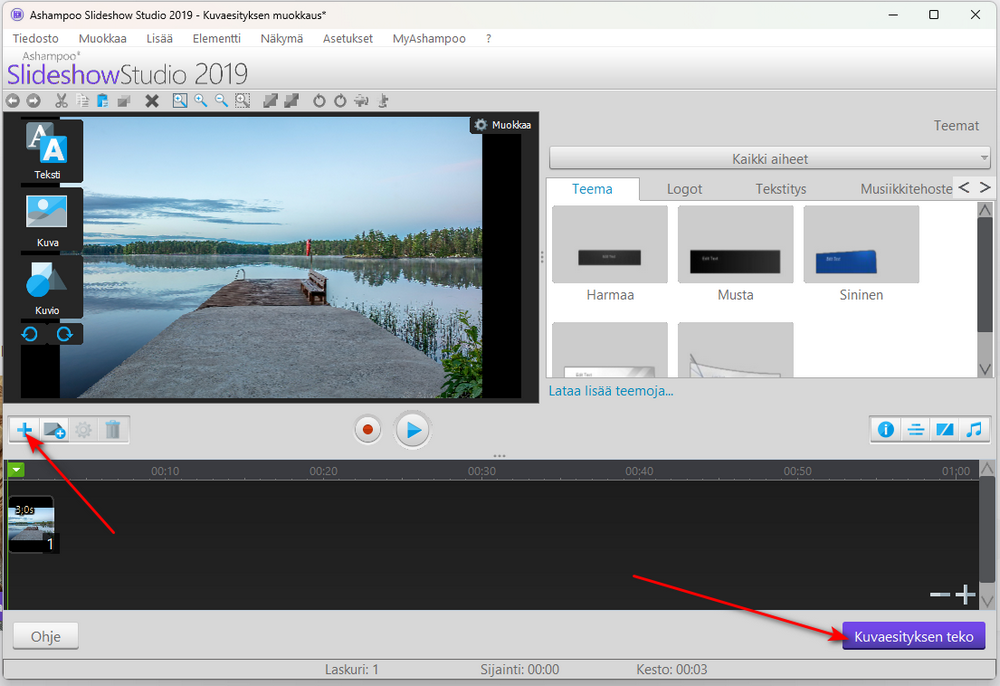
You can add more photos to the slideshow with the + (Add) button in the bottom left corner. When all the photos you want are on the timeline, click Create slideshow in the bottom right corner.
Previewing the slideshow and transitions
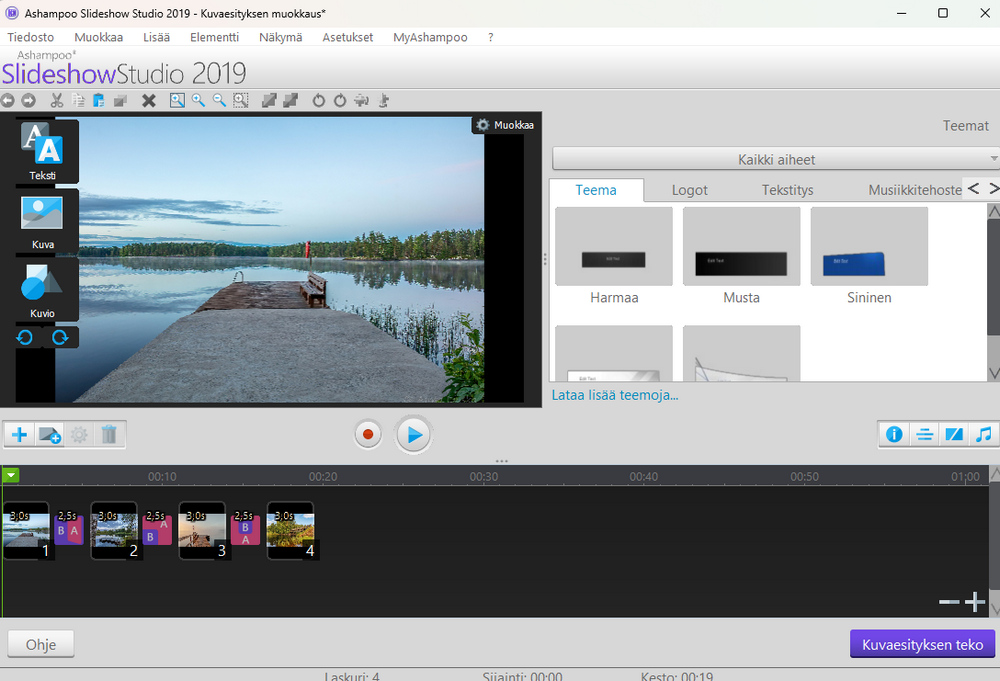
On the timeline you can check the order of the photos, their durations and the automatically added transitions before the final save.
Creating the video file
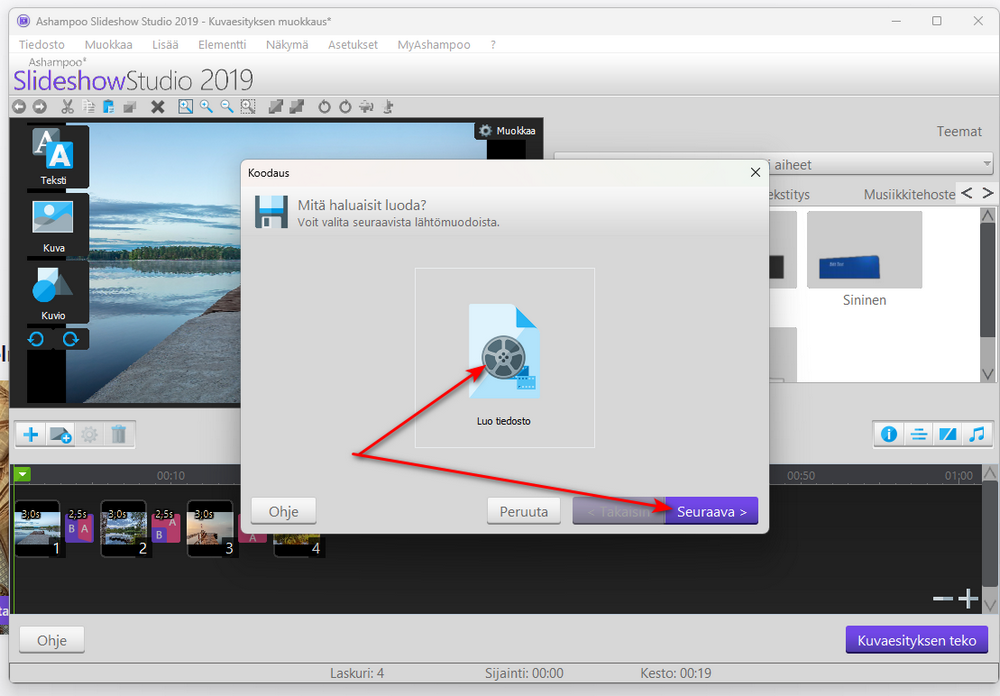
Choose Create file as the encoding option and click Next > to continue to choosing the format.
Choosing the format and quality
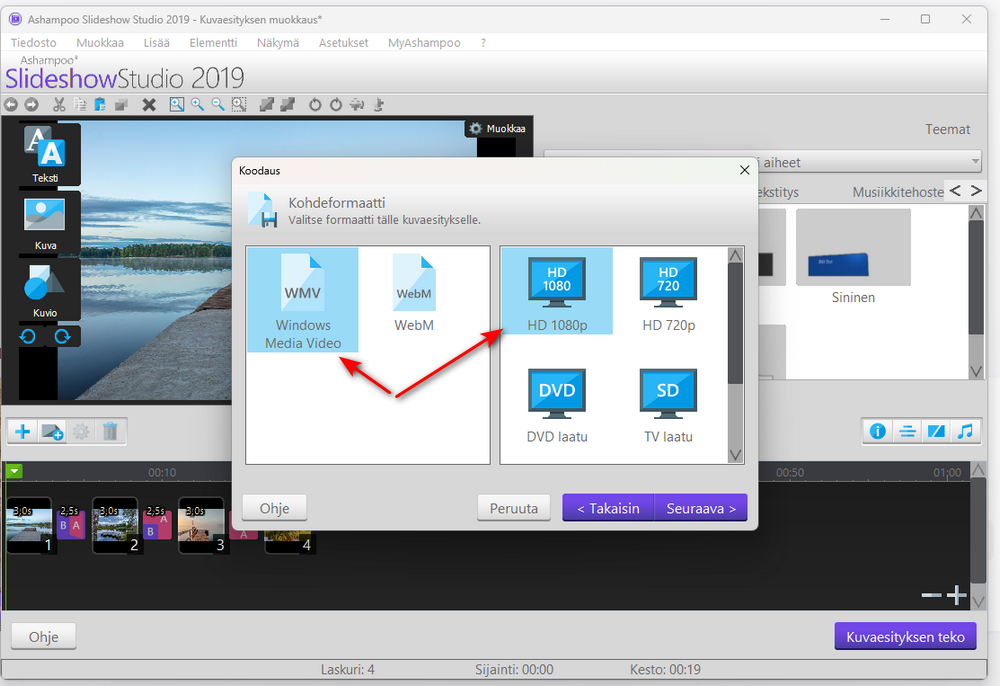
Choose MP4 (H.264) as the video format and the picture quality you want (e.g. HD 1080p) and click Next >. MP4 works on every device – phones, TVs, YouTube and social media. It's best to avoid the old WMV format, because it doesn't work for example on iPhones or many TVs.
Choosing where to save
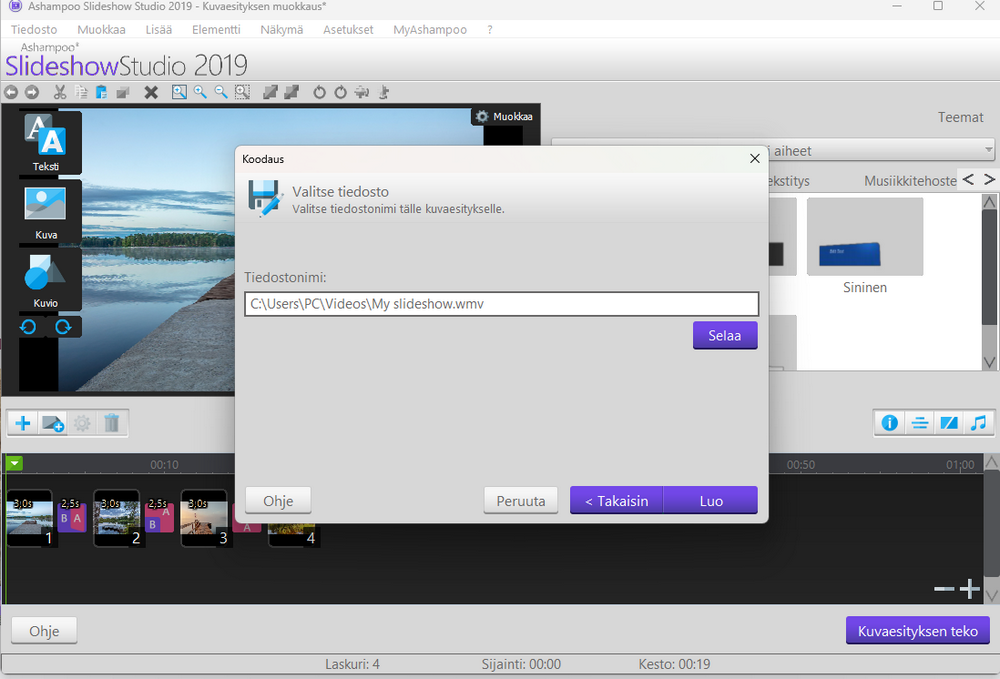
Check or change the file's save location and name with the Browse button. Start creating the video by clicking Create.
Encoding finished
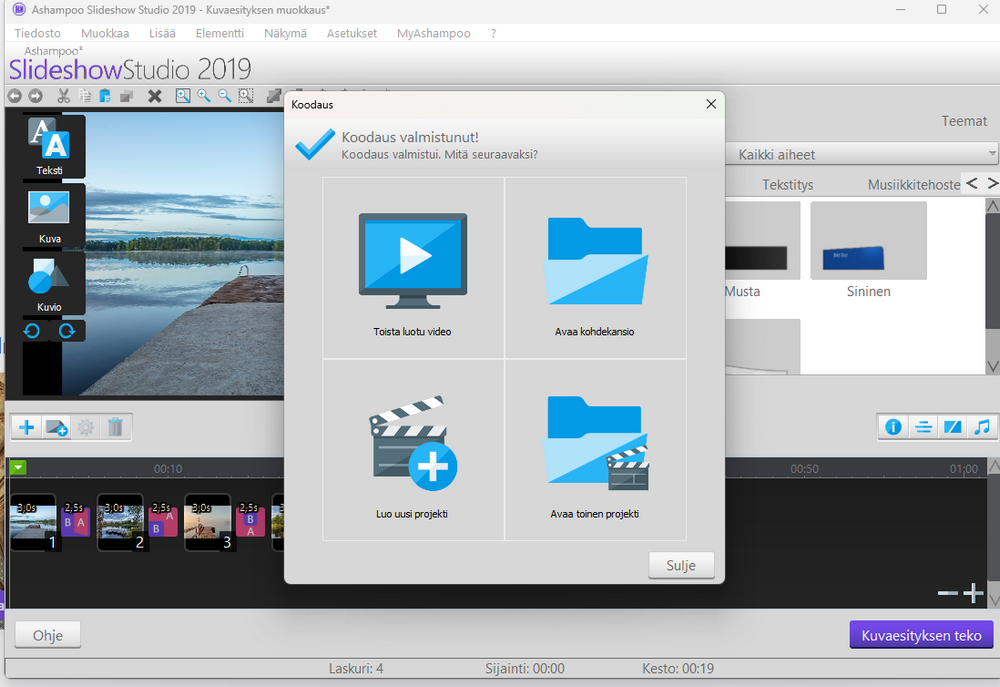
Done! The video has been encoded and saved on your computer. You can watch the video straight away by choosing Play created video or open the folder by choosing Open target folder.