Clipchamp: a free video editor
Clipchamp is Windows' own free video editing program, and it's already on your computer. In this guide we make a first video from start to finish: photos and video clips, cutting, text, music and saving the finished video.
Which free video editor was it again?
There are two good free video editors for the computer, and this site has a guide for both:
| Program | For whom | Good to know |
|---|---|---|
| Clipchamp (this guide) | For beginners and everyday videos: slideshows, travel videos, social media videos | Comes with Windows 11, easy to learn, also works on a slower computer |
| DaVinci Resolve | When you want more: precise editing, colour grading, 4K video | Downloaded from the maker's website, needs a powerful computer and more learning |
Start with Clipchamp. If you run into its limits, move to DaVinci Resolve. Many people never need anything but Clipchamp.
1. Where do you get Clipchamp?
Watch out: You don't need to download Clipchamp from any other site. Search engine ads have "Clipchamp downloads" and paid "activations" that are scams. The real program comes only from the Microsoft Store or clipchamp.com.
How the window is laid out
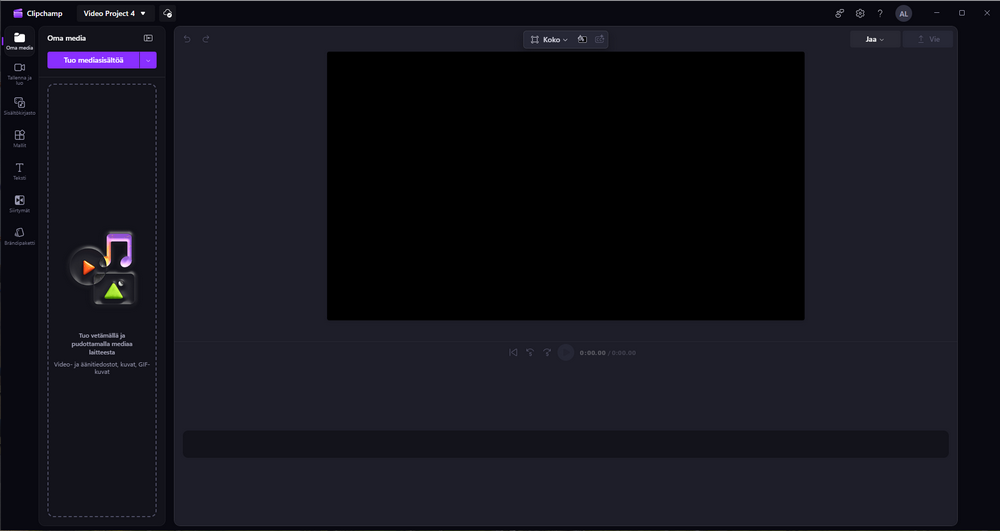 Clipchamp's editing view
2. Your first video step by step
As an example we make a video from the photos and video clips of a photo trip.
Start a new video
Open Clipchamp and choose Create a new video. Give the project a name straight away, for example "Lapland trip 2026", by clicking the Untitled video text at the top.
Import photos and videos
Press Import media or drag the files from File Explorer into the Clipchamp window. They appear on the Your media tab. It's best to move phone photos to the computer first.
Drag them to the timeline
Drag the photos and videos to the timeline in the order they will be shown. You can change the order later by dragging the clips.
Adjust how long photos are shown
A photo has a short default duration. Make it longer or shorter by dragging its edge on the timeline. A calm pace is 3–5 seconds per photo, and photos that change to the beat of the music can be shorter.
Add transitions
Move the mouse between two clips and press the + sign that appears, or choose Transitions on the left edge. A soft fade (Crossfade) suits almost everything. Use the same transition throughout the video, and the result looks calm.
Add a title and music
Drag a title template from the Text tab to the start of the video and type your text in it. Add background music from the Music and sound effects library or from your own file. Shorten the music to the length of the video and put a fade at the end.
Watch it through and save
Watch the whole video using the space bar. Then press the Export button in the top-right corner and choose 1080p. The finished MP4 file is saved in the computer's Downloads folder.
3. Cutting and the timeline
The unnecessary starts and ends of video clips are cut off. Cutting keeps the video tight and keeps the viewer interested.
The rule of thumb for a good video: Shorter is almost always better. A tight three-minute video gets watched to the end, but a ten-minute video is often left unfinished. In social media videos the first 2–3 seconds decide whether the viewer keeps watching.
4. Text, music and sound
Music copyright: If you use a commercial song, for example a radio hit, YouTube or Facebook can mute or block the video. Use music from Clipchamp's own library, the YouTube Audio Library or other copyright-free music.
5. Picture adjustment, speed and cropping
When you choose a clip on the timeline, its adjustments appear on the right edge:
6. Saving the finished video (Export)
| Quality | For |
|---|---|
| 1080p (recommended) | YouTube, Facebook, television and your own archive. This is the best quality in the free version. |
| 720p | A smaller file, for example for email or WhatsApp |
| 480p | Only a quick preview of a draft |
| 4K | Only in the paid Premium version |
| GIF | A short, silent, looping clip (up to about 15 seconds) |
Tip: Exporting usually takes about as long as the video, sometimes longer. Keep Clipchamp open for the whole export. The finished file is in the Downloads folder, and you can also save it straight to OneDrive or send it to YouTube.
7. Is the free version enough?
For most people it is. The free version has no watermark and no time limit, and it has all the features in this guide.
| Feature | Free | Premium |
|---|---|---|
| Export | 1080p, no watermark | 4K |
| Cutting, text, transitions | All the basic features | The same |
| Subtitles and text to speech | Yes | Yes, with more voices |
| Stock library (videos, music, effects) | Part of it | All of it, including items marked with a diamond icon |
| Cloud backup of projects | No | Yes |
Information checked on 7 November 2026. Microsoft changes its plans from time to time, so check the current price in the Clipchamp app itself before subscribing.
The most important shortcuts
| Key | Action |
|---|---|
| Space | Play / pause |
| S | Split the clip at the playhead |
| Delete | Delete the selected clip |
| Ctrl + Z | Undo the previous change |
| Ctrl + Y | Redo an undone change |
| Ctrl + C / V | Copy and paste a clip |
| Ctrl + D | Duplicate a clip |
Things to keep in mind and common problems
Other video editors: DaVinci Resolve (free, professional level) and Magix Video deluxe (paid, lots of ready-made effects). For editing photos before the video, Windows' own Paint works well.